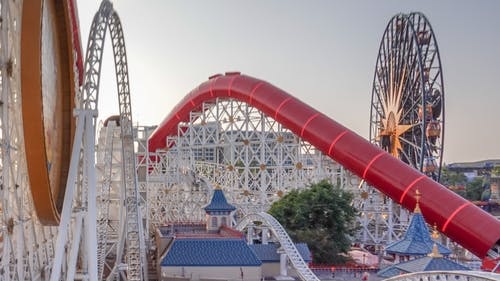
This is a steel roller coaster and the only ride that inverts passengers in a loop. Although it reaches a top speed of 55mph, it feels a lot faster because it goes from 0 to 55 in under 4 seconds!
It’s the longest looping roller coaster in the world at over a mile long. It uses 5,000 hp linear induction motors instead of the traditional chain to launch the train up the first hill and also midway through the ride. It has safety sensors all over the track, and will automatically stop the train if a backpack or purse falls onto the track from a passenger (both of which has happened).
We’re going to build a height gauge and a roller coaster ourselves! That way, you can really tell how high that first drop is. Here’s the first video you need to watch to build the height gauge:
Once you’ve built a height gauge, it’s time to make your own roller coaster! Note, you don’t have to build the height gauge in order to make the roller coaster, it’s two separate projects.
Roller coasters are a prime example of energy transfer: You start at the top of a big hill at low speeds (high gravitational potential energy), then race down a slope at break-neck speed (potential transforming into kinetic) until you bottom out and enter a loop (highest kinetic energy, lowest potential energy). At the top of the loop, your speed slows (increasing your potential energy), but then you speed up again and you zoom near the bottom exit of the loop (increasing your kinetic energy), and you’re off again!
To make the roller coasters, you’ll need foam pipe insulation, which is sold by the six-foot increments at the hardware store. You’ll be slicing them in half lengthwise, so each piece makes twelve feet of track. It comes in all sizes, so bring your marbles when you select the size.
The ¾” size fits most marbles, but if you’re using ball bearings or shooter marbles, try those out at the store. (At the very least you’ll get smiles and interest from the hardware store sales people.)
Cut most of the track lengthwise (the hard way) with scissors. You’ll find it is already sliced on one side, so this makes your task easier. Leave a few pieces uncut to become “tunnels” for later roller coasters.
Here’s the video you need:
This last video I am including only because I am also a musician, and I thought it was really cool to see how Disney orchestrates (pun intended!) its special music into the ride:
If you want your kids to make more projects like this, and if you found this helpful and you find yourself thinking, “Hey, you know, I want this person to teach my kids science for me, and to create my curriculum lessons for me…” then we can do just that.
Go to www.SuperchargedScience.com
When you get there, you’ll see a video that shows you the science curriculum that I developed and teach.
If you like what you see on that website, just fill in the form below the video and your kids can get started today doing real hands-on science with everyday materials.
Aurora
Supercharged Science
Homeschool Science Curriculum
P.S. By the way, if you know anybody that might find this content useful or helpful, please share it! Thanks so much!!
P.P.S. You can connect with me on:
Facebook: https://facebook.com/superchargedsci
YouTube: https://www.youtube.com/user/auroram42
Podcast: https://podcast.superchargedscience.com/
Instagram: http://instagram.com/auroralipper/
Twitter: https://twitter.com/aurora_lipper

